Before preheating, you’ll need to cure your oven first by running it at top temperatures for 30 minutes to remove manufacturing residues. After curing, smaller pizza ovens take about 20 minutes to preheat, while larger models with thick walls require 1.5 to 2 hours for the dome and floor to reach ideal cooking temperatures. Wood-fired ovens typically need 20 to 60 minutes, whereas gas ovens preheat in roughly 10 minutes. The exact timing depends on your oven’s size, wall thickness, and fuel type, though understanding these variables will help you prepare perfectly.
Key Takeaways
- Cure your pizza oven the day before first cook by running multiple 30-minute cycles at top temperature to remove manufacturing residues.
- Wood-fired ovens require 20 to 60 minutes preheat time; gas ovens typically reach cooking temperature in about 10 minutes.
- Larger ovens with 4.5″ walls need approximately 1.5 to 2 hours for complete uniform preheating of dome, floor, and walls.
- Target dome temperature of 700–800°F and floor temperature of at least 650°F, verified with infrared thermometer or thermal probes.
- Smaller pizza ovens may require only 20 minutes preheat, while preheat duration depends primarily on oven size and wall thickness.
Cure Your Oven Before You Preheat: The Non-Negotiable First Step
Before you fire up your outdoor pizza oven for the first time, you’ll need to cure it—a process that removes manufacturing residues and prepares the stone for cooking. Initial seasoning involves running your oven at top temperatures for 30 minutes, then allowing it to cool completely before wiping it down. I recommend performing this curing process the day before your first cook to make certain thorough residue removal. You should repeat multiple 30-minute runs initially, as this practice firing teaches you fuel management while conditioning the stone. This essential preparation step guarantees your oven’s stone is truly ready for dough rise and proper pizza baking. Skipping curing risks compromising your oven’s performance and longevity.
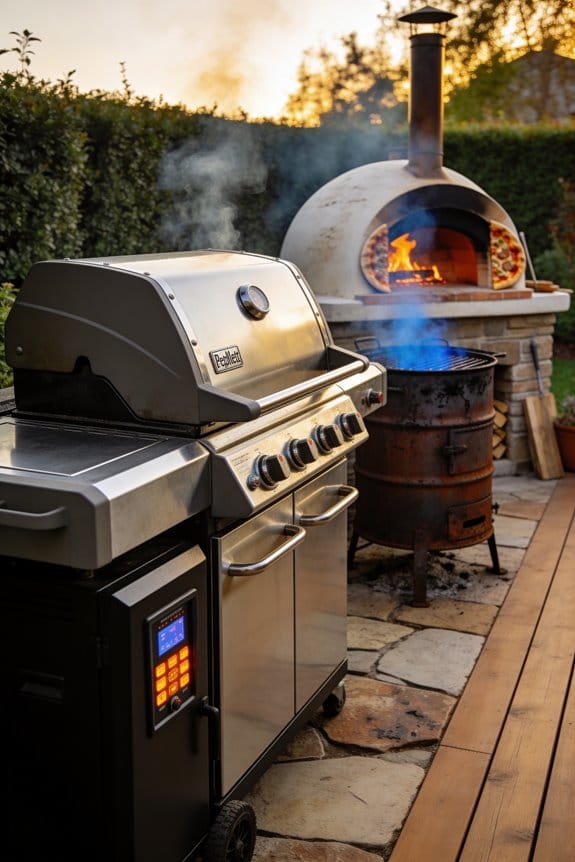
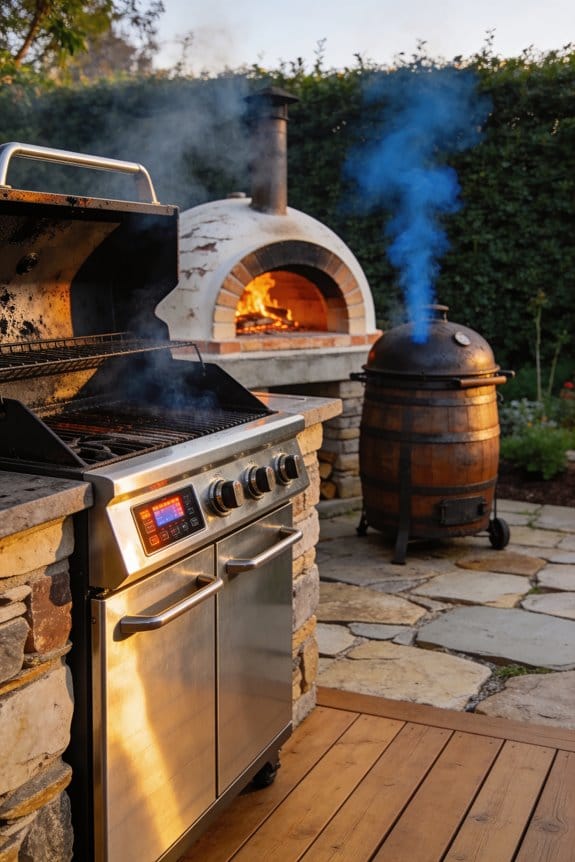
Wood vs. Gas: Preheating Speed Compared

When you’re ready to cook, the fuel type you choose dramatically affects how long you’ll wait before your oven reaches the ideal temperature. Gas ovens offer fast ignition and typically preheat in about 10 minutes, making them ideal if you’re short on time. Wood-fired ovens take longer—usually 20 to 60 minutes—but provide superior energy efficiency once heated. With a wood-fired oven, you’ll gain better flame control over your cooking experience, though you’ll manage startup emissions as the fire develops. Gas gives you convenience and speed through direct heat application, while wood requires patience but rewards you with consistent, sustained heat. Your choice depends on whether you prioritize quick preparation or long-term heating reliability.
Oven Size and Wall Thickness: Why They Add Hours

The size of your pizza oven and the thickness of its walls create a substantial thermal mass that directly extends your preheating time, since larger ovens and thicker brick require more energy to heat throughout. A 36″ to 42″ oven with 4.5″ walls needs approximately 1.5 to 2 hours for complete preheating, compared to smaller models that may require only 20 minutes. Thicker walls provide better heat retention and insulation, but they also mean a slower ramp in temperature during the initial heating phase. This thermal mass acts like a sponge, absorbing heat gradually. Longer preheat times guarantee the entire structure—dome, floor, and walls—reaches peak temperature, preventing cold spots that compromise cooking quality and consistency.
Getting Your Dome and Floor to Target Temperature

Once your oven’s walls and dome have absorbed enough heat during the preheating phase, you’ll need to monitor two specific temperature zones to guarantee peak cooking conditions. The dome should reach 700-800°F for optimal pizza baking, while your floor requires at least 650°F minimum. I recommend checking both areas with an infrared thermometer to make certain accurate dome calibration. The middle floor area, where you’ll actually bake, should sit between 650-750°F for consistent two-minute bakes. During floor seasoning before your first cook, run the oven at top temperatures for thirty minutes to prepare the stone properly. These target temperatures work together, creating the thermal balance needed for perfectly cooked pizzas throughout your cooking session.
Quick Heat-Up vs. Deep Heat: Which Works Better for Your First Cook?

Although it might seem faster to just get your oven hot enough to cook pizzas, I’ve found that taking time for deep, thorough heating actually produces better results for your first cook. A fast start gets your dome to temperature quickly, but a slow soak allows the entire oven—including the floor and brick mass—to reach uniform heat. This thermal ramp builds gradually, creating consistent cooking conditions. During this extended heating, you’ll develop better ember control and learn how your oven responds to fuel management. Four hours with a smaller fire heats more effectively than two hours with a large one, letting you cook six or more pizzas before temperature drops markedly. This preparation guarantees your first cooking experience succeeds.
Fuel Management and Heat Retention During Preheat
Managing your fuel carefully during preheating makes the difference between an oven that’s ready to cook and one that wastes time and resources. I’ve learned that fire staging—building your fire in phases rather than dumping all wood at once—gives you better temperature control. Start with kindling and smaller pieces, then gradually add larger hardwood as your flames develop. Ember distribution across the oven floor guarantees even heat throughout the cooking chamber. By spreading embers strategically with a poker, I maintain consistent temperatures without creating hot spots. Adding wood every twenty minutes during the preheat phase keeps temperatures rising steadily. This methodical approach prevents temperature fluctuations and maximizes heat retention, preparing your oven efficiently for your first cook.
Knowing When Your Oven Is Ready: Temperature Cues You Can Trust
All your careful fire staging and ember management during preheating leads to one critical question: how do you know your oven has actually reached the right temperature?
I’ve found that visual cues provide reliable indicators. When your dome glows a faint orange or amber color, you’re approaching 700-800°F. The floor should appear lighter in color, almost whitish from heat. However, visual cues alone aren’t always precise.
For accuracy, I recommend using thermal probes or infrared thermometers. These tools measure exact temperatures at the dome and floor, ensuring you’ve reached your target range. Different stone types require different temperatures—standard stones need 750°F, while Saputo stones perform optimally at 850°F.
Four Preheating Mistakes That Tank Your First Cook
Because you’ve invested time learning to read temperature cues and manage your fire, it’s easy to overlook the common errors that can sabotage your first cook. Cold starts—beginning with an oven that hasn’t reached proper temperature—cause uneven baking and disappointing results. Damp wood creates excessive smoke and inconsistent heat, preventing your oven from reaching the target 750°F. Rushing fire by building it too quickly leads to temperature spikes followed by dangerous drops. Uneven ash distribution across the floor creates hot spots and cold zones, resulting in poorly cooked pizzas. To avoid these pitfalls, allow adequate preheating time, use dry hardwood exclusively, build your fire gradually and methodically, and rake ash evenly before cooking. These fundamentals guarantee your first cook succeeds.
Keeping Heat Stable Between Pizza Batches
Once you’ve finished your first pizza and the oven temperature begins to drop, you’ll need a strategy to maintain consistent heat for the next batch. I’ve found that fuel rotation works best—adding wood every 20 minutes keeps temperatures stable between pizzas. Ember management is equally important; I rake coals toward the back or sides, creating even heat across the cooking surface. Batch timing matters too; I typically refire the oven after every 7-10 pizzas, adding wood for 15-20 minutes to restore peak temperature. This approach prevents the dome from cooling excessively while ensuring each pizza cooks consistently. By planning ahead and staying attentive to your fuel supply, you’ll maintain the reliable heat needed for successful multiple batches throughout your cooking session.
What to Do After Your First Cook: Maintenance and Next Steps
After you’ve cooked your final pizza and let the oven cool, taking time to clean and inspect your outdoor pizza oven sets the foundation for its longevity and performance. Remove ash and debris from the cooking surface using a metal scraper, which prevents buildup that affects heat distribution. Store your tool care items, including scrapers and brushes, in a dry location to prevent rust and deterioration. Plan seasonal maintenance by checking the dome and floor for cracks, as temperature changes cause expansion and contraction. Inspect mortar joints for damage and address issues promptly. Cover your oven during off-seasons to protect against weather exposure. These practices guarantee your oven remains functional and ready for your next cooking adventure.
Frequently Asked Questions
Can I Preheat My Pizza Oven During Rain or Cold Weather Conditions?
Yes, you can preheat during rain or cold weather, though it’ll take longer. I’d recommend using weatherproof covers and ensuring strong thermal insulation below your oven’s floor. Cold ambient conditions markedly extend preheating time considerably.
Should I Use Charcoal or Briquettes Instead of Firewood for Preheating?
I’d recommend sticking with dry hardwood for preheating rather than charcoal or briquettes. Hardwood gives you better temperature control and authentic charcoal flavoring. Plus, briquette disposal creates unnecessary cleanup hassles.
Is It Safe to Preheat an Oven Near My House or Deck?
I’d keep your oven at a safe distance from combustible materials like your house and deck—think of it as respecting fire’s ancient power. Maintain at least 10-15 feet clearance to prevent heat damage and guarantee everyone’s safety.
Can I Use an Infrared Thermometer to Accurately Check My Oven’s Temperature?
I’d recommend using laser thermometers for your pizza oven, but you’ll need to make emissivity adjustments for accurate readings on stone surfaces. They’re helpful, though traditional methods often work best.
How Often Should I Professionally Inspect My Oven Before First Use?
I’d recommend a pre-use check before your first cook rather than waiting for an annual inspection. Have a professional evaluate your oven’s structural integrity, dome condition, and floor stability to make certain it’s safe and ready.