I’d recommend starting with a gas grill since it preheats quickly in 10–15 minutes and offers easier temperature control. You’ll need basic tools like tongs, a meat thermometer, and a grill brush. Create two heat zones by using direct heat for quick searing and indirect heat for slower cooking. Pat your meat dry before grilling, flip burgers only once, and always use a thermometer to check doneness—chicken reaches 165°F, beef 145°F. Avoiding common mistakes like overcrowding and applying sugary sauces too early makes a real difference in your results, and there’s much more technique to master.
Key Takeaways
- Start with gas for easier temperature control and faster preheat times, allowing you to focus on technique rather than fuel management.
- Invest in essential tools: instant-read thermometer, tongs, metal spatula, and grill brush for consistent results and food safety.
- Create two heat zones—direct and indirect—to sear proteins quickly then finish them gently without overcooking or burning.
- Pat meat dry, preheat adequately, and avoid crowding the grill to ensure proper browning and even cooking throughout.
- Use an instant-read thermometer to verify doneness at the thickest part; rest meat 5–10 minutes before serving for optimal results.
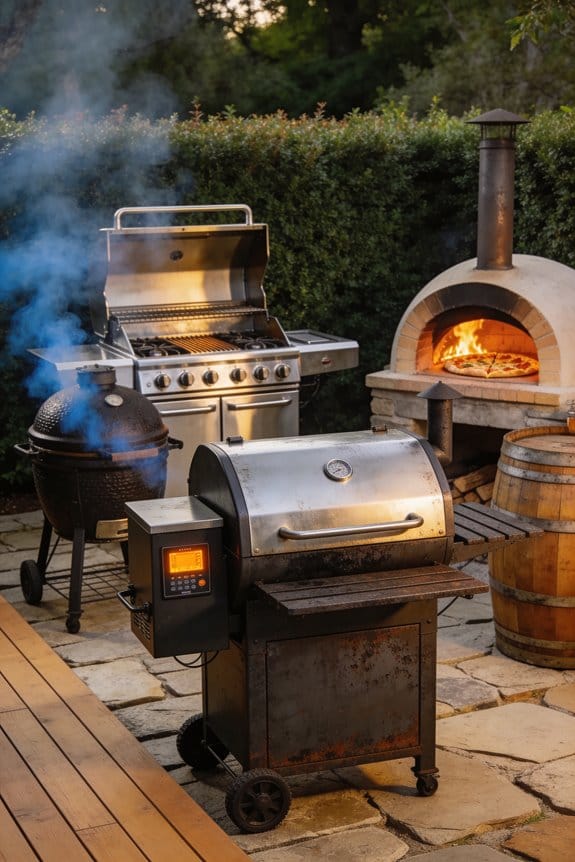
Gas or Charcoal: Why Gas Wins for Beginners
When you’re starting your grilling journey, you’ll typically encounter two main fuel options: gas and charcoal, each with distinct advantages and challenges. Gas grills offer superior convenience for beginners because they provide easier temperature control and instant ignition without complicated lighting procedures. You’ll appreciate the quick preheat time of 10-15 minutes, allowing faster cooking sessions.
Charcoal grills, while delivering authentic smoky flavor, demand notably more skill and patience. They require 30 minutes to reach medium heat and necessitate careful propane safety considerations when handling fuel. There’s also a flavor compromise with gas since you won’t achieve charcoal’s distinctive smokiness.
For novices prioritizing reliability and simplicity, gas grills eliminate steep learning curves. You’ll focus on mastering basic cooking techniques rather than managing fire conditions, making your initial grilling experiences more successful and enjoyable.
Essential Grilling Tools for Beginners

Before you fire up your gas grill for the first time, gather the right tools to guarantee safe and successful cooking. You’ll need tongs, a metal spatula, and a grill brush as your basic grill accessory collection. An instant-read meat thermometer guarantees you’re cooking food to safe internal temperatures. I recommend investing in high smoke point oil, a rag, and paper towels for oiling grates before cooking.
Consider storage solutions like a tool caddy or designated drawer to keep everything organized and accessible. A chimney starter isn’t necessary for gas grills, but having one handy proves useful if you experiment with charcoal later. These essential items create a foundation for confident, successful grilling experiences that’ll keep you cooking safely and effectively.
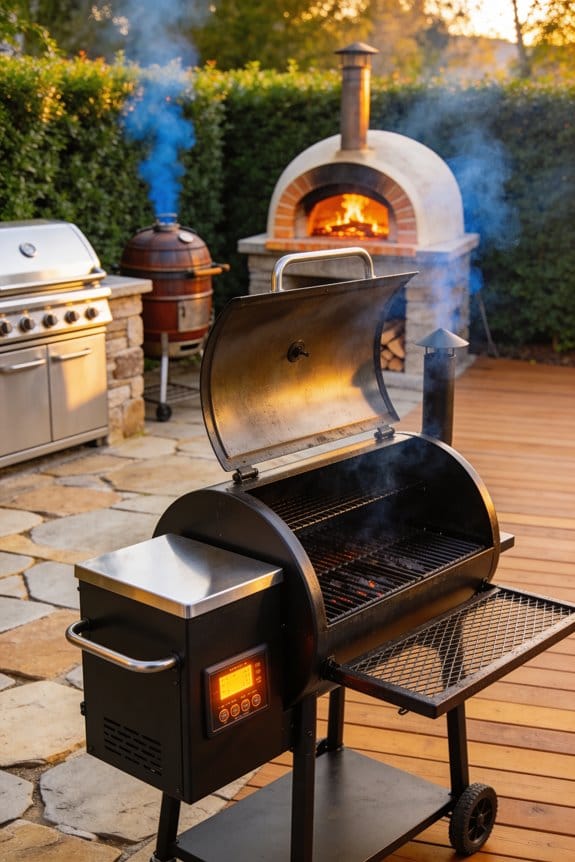
Light Your Grill the Right Way

Now that you’ve gathered your tools and prepared your workspace, it’s time to learn how to safely light your grill so you’re ready to cook. For charcoal grills, I recommend using a chimney starter, which is a metal cylinder that holds charcoal while you light it from underneath. This method avoids lighter fluid, preventing unwanted fuel taste in your food. Once the coals turn ashen, pour them into your grill. For coal arrangement, spread the briquettes one to two inches beyond where your food will sit, creating an even heat base. Gas grills require simpler steps: turn on the burners, close the lid, and preheat for ten to fifteen minutes on medium heat. Either way, proper lighting guarantees safe, successful cooking.
Master Direct and Indirect Heat Zones

Understanding the difference between direct and indirect heat transforms your grilling ability, allowing you to cook almost any food successfully. Direct heat means placing food directly over flames or hot coals, which creates a quick sear on thin items like burgers and vegetables. Indirect heat involves cooking away from the heat source, using a drip pan to catch juices and prevent flare-ups.
I recommend creating two heat zones on your grill. Position charcoal placement on one side for high direct heat, then leave the other side empty for indirect cooking. This setup lets you sear meat briefly on the hot side, then move it to the cooler zone to finish cooking slowly. The hand test—holding your palm above the grates—helps you gauge temperature accuracy before cooking begins.
Beginner Prep Tips for Perfect Results

Since preparation determines your grilling success more than any other factor, I’ve found that mastering a few key steps before you even light your grill makes the entire cooking process smoother and more enjoyable. First, I always pat my meat dry with paper towels, which creates better browning when it hits the hot grates. Next, I plan my marinade timing carefully, allowing adequate hours for flavors to penetrate while avoiding over-marinating. Before cooking, I oil the grates thoroughly using high smoke point oil and a rag, ensuring food won’t stick. Finally, I account for resting periods after grilling ends, letting carryover cooking complete the process. These fundamental steps eliminate common beginner mistakes and set you up for consistently excellent results.
Flip Burgers Once, Veggies Often: Here’s Why
One of the most common mistakes beginners make is flipping their food too frequently, yet this rule doesn’t apply equally to everything you cook. Burgers need minimal flipping—typically once or twice—because frequent turning disrupts the searing process and prevents proper crust development. The patting technique matters here; I dry my burgers thoroughly before cooking, which helps achieve that desirable brown exterior through better contact with the grill.
Vegetables, however, require different temperature control and handling. I flip thin, tender vegetables often to guarantee even browning and prevent burning. Thicker root vegetables need less frequent flipping since they cook slowly on indirect heat. Understanding these distinctions helps beginners avoid common pitfalls and achieve better results across different foods.
Use a Meat Thermometer to Cook Safely
While understanding how to flip different foods helps you achieve better browning and texture, knowing the internal temp of your meat guarantees you’re cooking it safely for eating. I recommend using an instant-read thermometer, which gives accurate readings in seconds. Proper probe placement is critical for reliable results; insert the thermometer into the thickest part of the meat, away from bone or fat. Different proteins require different temperatures: chicken reaches safe doneness at 165°F, beef at 145°F for medium-rare, and pork at 145°F. By checking your food’s internal temp rather than relying on appearance alone, you’ll eliminate guesswork and prevent undercooking or overcooking.
Avoid Common Grilling Mess-Ups
Even with the best preparation, beginners often make mistakes that can ruin their meal or create safety hazards on the grill. One common error is using wrong marinades that contain sugar, which burns easily on high heat and creates bitter flavors. Instead, reserve marinades with sugar for the last few minutes of cooking. Another frequent mistake is skipping rest, which means cutting into meat immediately after grilling. Resting allows juices to redistribute throughout the meat, making it more tender and flavorful. I’d recommend waiting five to ten minutes depending on thickness. Additionally, overcrowding the grill prevents proper heat circulation and browning. Finally, neglecting to preheat your grill adequately compromises cooking consistency and food safety, so always allow sufficient time before adding food.
Master Your First Grill: Easy Burger, Hot Dog, and Chicken Recipes
Now that you’ve learned how to avoid common pitfalls like overcrowding and inadequate preheating, you’re ready to put your knowledge into action by cooking some beginner-friendly meals. Start with smash burgers, which require minimal technique—simply place ground beef on hot grates and press flat with your spatula for excellent browning. Hot dogs cook quickly on direct heat, needing just a few minutes per side. For chicken, use indirect heat to prevent burning while ensuring the internal temperature reaches 165°F using your instant-read thermometer. Beer brats offer another forgiving option; grill them slowly over medium heat until browned throughout. These recipes build confidence while delivering satisfying results, proving that grilling success comes from understanding heat control and proper timing rather than complex skills.
Frequently Asked Questions
How Do I Know When Charcoal Is Ready Without a Thermometer?
I’d watch for ash coverage over your coals and their glow. You’ll see the charcoal color shift from black to gray. Try the hand test—hold your hand above the grates; if you can’t keep it there long, you’re ready.
Can I Use Regular Oil to Oil My Grill Grates?
I wouldn’t recommend regular vegetable oil—you’ll want high smoke point oils instead. They won’t break down at grilling temperatures. I use them with tongs and a rag to coat my grates properly before cooking.
What’s the Ideal Distance Between My Grill Grate and Heat Source?
I’ve got you covered. Keep your grate height between 4-6 inches from the heat source—that’s your sweet spot. This heat gap lets you control temperature zones, whether you’re searing hot or cooking low and slow without burning your food.
How Often Should I Replace or Clean My Grill Brush?
I’d recommend cleaning your grill brush before every use and replacing it annually. I use firm bristles with a wire brush, scrubbing grates while they’re hot. This replace frequency keeps your cleaning methods effective and prevents bristle shedding.
What Temperature Indicates Safe Doneness for Different Types of Meat?
I use an instant-read thermometer to check internal temperatures: chicken at 165°F, beef at 145°F medium-rare, pork at 145°F, and fish at 145°F. I account for carryover cooking by removing meat 5°F earlier.